Happy Valentine’s Day Everyone!

I hope everyone is taking time to enjoy today with your loved one or loved ones or treating yourself to some pampering of your choice!  I’m taking it easy … just “chill-laxing” in my recliner and watching some movies, with the yorkies in my lap — possibly ordering in a nice hot pizza. Life is good!

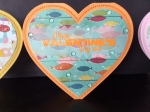
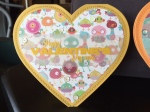
I thought I’d share the Valentine’s cards I made.  Since the recipients should have received them by now, I thought it appropriate to share some cardmaking love with you all!

Please forgive the wonkiness of the photographs – the cards were all made straight, but the angle by which I took the pictures is odd in some cases.  I am working on my photography skills and saving for a new camera.  I am currently using my cell phone.

These first three were made for my great-niece and great-nephews.

EmmasCard MaxCard ZachsCard

The card stock for the bases is from Gina K. Designs.  The patterned paper is from my stash. The sequins are from http://www.ccartwright.com. The card base was die cut with Little B’s Hearts die set – fabulous set!  You can cut or just emboss or cut AND emboss with this set. The card was cut with the largest die and embossed with the next largest die. Love it!  The sentiment is from Impression Obsession’s Valentine Hearts set.  It was stamped with Versamark Ink and set with various Zing! embossing powders to match the cards.

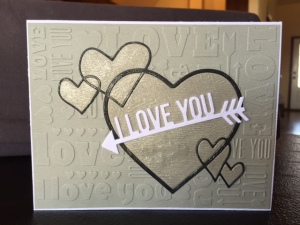
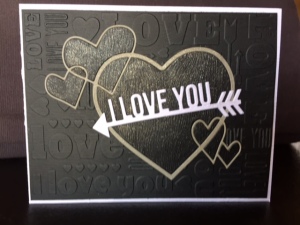
These next cards, I call a “companion set” as I switch die cut elements between the two cards to get different looks.

Austenscard TylersCard

The embossing folder used in the background is from Lifestyle Crafts Sweetheart embossing folder set.  I use this same embossing folder in another card in this post, but with a slightly different twist.  The hearts and frame around the hearts were cut in the same colored cardstock as the embossed piece – however, the frames where switched between the two cards – providing contrast to the background.  The die used is Memory Box’s Heart Ensemble.  The arrowed sentiment is from My Favorite Things Die-namics Straight To My Heart die set.  All papers are wood grain embossed.  The card base is paperandmore.com’s Woodgrain Limba White cardstock #111 – best wood grain cardstock on the market, IMO. The colored wood grain cardstock is from Taylored Expressions.  I used Zig’s clear Wink of Stella to add shimmer to the hearts on both cards. I chose these color schemes as my sons are in their 20’s and not into the flowery, mushy valentine’s stuff (although I did slide in some glitter! lol)

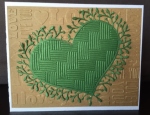
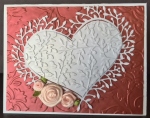
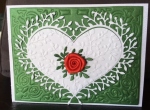
These next three cards use Memory Box’s Woodland Heart Frame die to create simple, yet elegant cards.

AmosCard WoodlandHeart WoodRose

To vary the look of the cards, I used different colored cardstocks and embossing folders for the backgrounds.  For the card on the left, I used craft cardstock embossed with the same folder used above – Lifestyle Crafts Sweetheart embossing folder.  I also embossed the center heart with Darice’s Basketweave folder.  This makes for a great valentine’s card for any man in your life. For the middle card, the background is embossed with Spellbinders M-Bossibilities Enchanted Design B. I pieced cuttings from several die cut branches using C. C. Designs Leafy Branch.  This added more texture and interest to the card front.  The ribbon flowers are from Papermart.com.  For the card on the far right, the green card stock was embossed with a die – Spellbinders Nestabilities A2 Filigree Delight.  The heart was embossed with Elizabeth Craft Designs Spring Leaves folder.  The ribbon flower is from Papermart.com.  Card bases are Neenah Solar White cardstock.  The red cardstock is paperandmore.com’s Crimson Red Metallic105# 5×7.  The green cardstock is paperandmore.com’s Metallic Botanic Green — it’s absolutely beautiful in person.

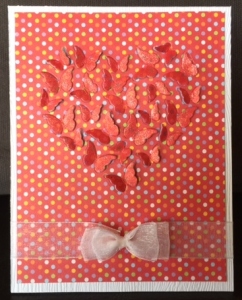
These next two cards used the same die, but in in different ways.

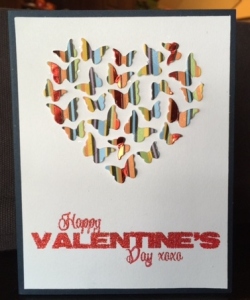
RedBtrflyHeart StripedBtrfly

The card on the left, used Memory Box’s Butterfly Heart as  designed – it cut the outline of the wings so that they can be lifted up for dimension.  I used Zig’s Wink of Stella in red to paint the wings to add more contrast.  A piece of blue vellum was put on the back for contrast.  The gauze ribbon is from papermart.com – the most economical way to buy ribbon.  (Hint, buy ribbon in either white or cream and use your paints or inks to color them to match your project!)  The card on the right also uses Memory Box’s Butterfly Heart die – however, this time I used my craft knife to continue cutting each of the butterflies out and placed them on a  white card base.   The sentiment is from Impression Obsession’s Valentine Hearts set.

Because it is getting late, I will wait to share the remaining  cards tomorrow! Take care and sweet dreams!

Hugs,

Stephanie
Waterfall Baseball Birthday Card

Hi all! I hope everyone survived their 4th of July celebrations! 🙂  One of my sons is in town, and we went to my brother’s house for grilled goodies (hamburgers and hot dogs) and lots of side fixin’s and homemade desserts! (I made strawberry cake — a family favorite!)

Tomorrow is another big day in our family – it’s my great-nephew’s 3rd birthday!!!  He’s having a baseball ball themed birthday party, so in keeping with the theme, I made him a baseball birthday card.  Here is a picture of the front of the card –

ImageHere are the different “bases” as they are turned over by pulling the tab at the bottom –

Image Image  Image  Image

Here is the inside of the card –

ImageI think he will love all the “pulling” and “pushing” action of the card.

Have a wonderful day friends! Hugs!

ETA – Hi all!  I am Editing To Add, that I am sharing this on Stacey’s Stamping Stage (http://stampinwithstacey.blogspot.com), in celebration of July birthdays!  So many wonderful people I know were born this month (my great nephew and oldest son!) !

Emma’s 5th Birthday Card

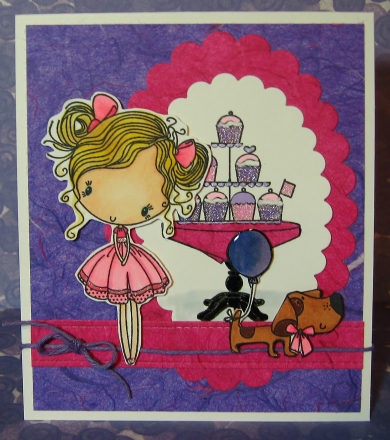
Hi all! I just wanted to share a birthday card I made for my great-niece’s 5th birthday.

Image

The stamp set is called Cupcake Cutie from My Favorite Things. I colored the little girl,the puppy  and balloon with Copic markers. Glossy Accents was applied for dimension and shine on the balloon.  I fussy cut all the images from Neenah Classic Crest Solar White cardstock.  The tablecloth was paper pieced with mulberry paper.  (The purple and hot pink paper elements are from some left over mulberry paper I had in my stash.)  I used Sakura Gelly Roll Stardust pens to color the trim and waistband on the girl’s dress, as well as on the cupcake wrappers. The table base was colored with a black Sakura Glaze Pen, and the icing on the cupcakes was colored with Sakura Souffle Pens. Dies used for cutting the mats for the table are Sizzix Scallop Ovals.  The bow is made from the purple crafter’s cord from Hemptique’s Vintage collection.

The “happy birthday” sentiment from this set is stamped on the inside of the card, as well as the cute puppy with the balloon!

The little girl reminds me so much of Emma! 🙂

Hope you all are having a long, fun and safe weekend! Hugs!

Moxie Fab World’s The Gift Challenge

The Gift Challenge at Moxie Fab World is another celebration of their issue – 350 Cards and Gifts!  Click on the following image to get more details for this challenge.

My great-niece is turning five today! Yea!!!  We are celebrating her birthday on Saturday – and one of the items I am gifting is this item to hang in her room.

ImageI started with a solid, circular, green piece of styrofoam (found in the floral section of the craft store).  The styrofoam is about 2″ wide and about 8″ in diameter.  After printing off the sentiment on cardstock, I die cut and glued it to the front of the styrofoam.  I stamped several 4.25″ x 5.5″ panels of Neenah Solar white cardstock with Rubbernecker Stamps Zebra Background (http://www.rubbernecker.com/zebra-background.html) in Hero Arts Neon Pink, Neon Blue and Neon Orange.

The MFT Die-namics Upsy-Daisy dies were used to die cut the stamped panels into flowers.  Leaves were die cut from green core-dinations paper with leaf dies from the same set.  I also cut a few green branches with a die from the Taylored Expressions Branches, Banner and Bloom die set (which you can see in the center of the piece). The centers of the flowers were created with Viva Decor’s Paper Pen in Sunny Yellow.

The outside width of the styrofoam was wrapped with 2.25″ white grosgrain ribbon.  I lined up the edge of the white ribbon with what was to be the “front” of the piece where I would glue the flowers.  This left a little over a quarter of an inch of the ribbon to glue down on the the back.  Another sheet of the green core-dinations paper (same color as the leaves) was glued on the “back” of the styrofoam piece to finish the back of the piece.

A checked 1.5″ Offray ribbon (from JoAnn’s – http://www.joann.com) was wrapped around the outside  edge – centered on the white grograin already adhered to the styrofoam – and glued in place.  I then used another length of the same ribbon to create the “hanger and bow” to set the piece in. It was adhered it with Scor-tape on the inside lower half of the hanger.

For the wooden bird cage embellishment (from Michael’s – http://www.michaels.com),  a scrap piece of the same green core-dinations cardstock was glued to the back. Kool Tak clear dimensional foam adhesive was used to adhere it to the front of the styrofoam piece, before I put on the flowers.  It is embellished with bling from my stash. A piece of hemp jewelry cord is used for the bow at the top of the cage.  Here is a close-up view –

ImageI think she’ll love all the bright colors!

Hope you all are having a fun, crafty day!  Your comments are most appreciated! Hugs!