Happy Valentine’s Day Everyone!

I hope everyone is taking time to enjoy today with your loved one or loved ones or treating yourself to some pampering of your choice!  I’m taking it easy … just “chill-laxing” in my recliner and watching some movies, with the yorkies in my lap — possibly ordering in a nice hot pizza. Life is good!

I thought I’d share the Valentine’s cards I made.  Since the recipients should have received them by now, I thought it appropriate to share some cardmaking love with you all!

Please forgive the wonkiness of the photographs – the cards were all made straight, but the angle by which I took the pictures is odd in some cases.  I am working on my photography skills and saving for a new camera.  I am currently using my cell phone.

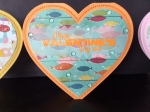
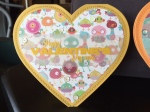
These first three were made for my great-niece and great-nephews.

EmmasCard MaxCard ZachsCard

The card stock for the bases is from Gina K. Designs.  The patterned paper is from my stash. The sequins are from http://www.ccartwright.com. The card base was die cut with Little B’s Hearts die set – fabulous set!  You can cut or just emboss or cut AND emboss with this set. The card was cut with the largest die and embossed with the next largest die. Love it!  The sentiment is from Impression Obsession’s Valentine Hearts set.  It was stamped with Versamark Ink and set with various Zing! embossing powders to match the cards.

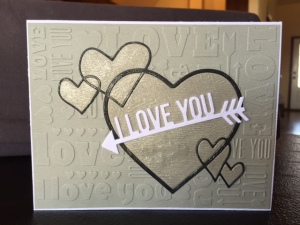
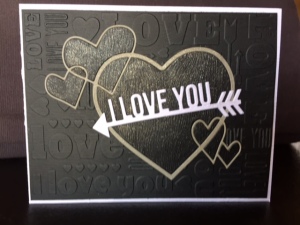
These next cards, I call a “companion set” as I switch die cut elements between the two cards to get different looks.

Austenscard TylersCard

The embossing folder used in the background is from Lifestyle Crafts Sweetheart embossing folder set.  I use this same embossing folder in another card in this post, but with a slightly different twist.  The hearts and frame around the hearts were cut in the same colored cardstock as the embossed piece – however, the frames where switched between the two cards – providing contrast to the background.  The die used is Memory Box’s Heart Ensemble.  The arrowed sentiment is from My Favorite Things Die-namics Straight To My Heart die set.  All papers are wood grain embossed.  The card base is paperandmore.com’s Woodgrain Limba White cardstock #111 – best wood grain cardstock on the market, IMO. The colored wood grain cardstock is from Taylored Expressions.  I used Zig’s clear Wink of Stella to add shimmer to the hearts on both cards. I chose these color schemes as my sons are in their 20’s and not into the flowery, mushy valentine’s stuff (although I did slide in some glitter! lol)

These next three cards use Memory Box’s Woodland Heart Frame die to create simple, yet elegant cards.

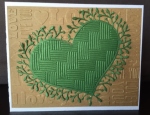
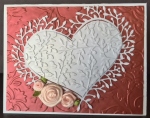
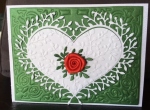
AmosCard WoodlandHeart WoodRose

To vary the look of the cards, I used different colored cardstocks and embossing folders for the backgrounds.  For the card on the left, I used craft cardstock embossed with the same folder used above – Lifestyle Crafts Sweetheart embossing folder.  I also embossed the center heart with Darice’s Basketweave folder.  This makes for a great valentine’s card for any man in your life. For the middle card, the background is embossed with Spellbinders M-Bossibilities Enchanted Design B. I pieced cuttings from several die cut branches using C. C. Designs Leafy Branch.  This added more texture and interest to the card front.  The ribbon flowers are from Papermart.com.  For the card on the far right, the green card stock was embossed with a die – Spellbinders Nestabilities A2 Filigree Delight.  The heart was embossed with Elizabeth Craft Designs Spring Leaves folder.  The ribbon flower is from Papermart.com.  Card bases are Neenah Solar White cardstock.  The red cardstock is paperandmore.com’s Crimson Red Metallic105# 5×7.  The green cardstock is paperandmore.com’s Metallic Botanic Green — it’s absolutely beautiful in person.

These next two cards used the same die, but in in different ways.

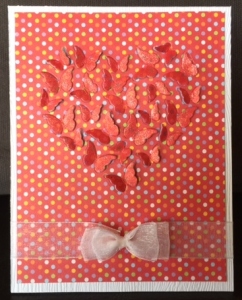
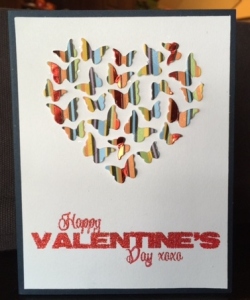
RedBtrflyHeart StripedBtrfly

The card on the left, used Memory Box’s Butterfly Heart as  designed – it cut the outline of the wings so that they can be lifted up for dimension.  I used Zig’s Wink of Stella in red to paint the wings to add more contrast.  A piece of blue vellum was put on the back for contrast.  The gauze ribbon is from papermart.com – the most economical way to buy ribbon.  (Hint, buy ribbon in either white or cream and use your paints or inks to color them to match your project!)  The card on the right also uses Memory Box’s Butterfly Heart die – however, this time I used my craft knife to continue cutting each of the butterflies out and placed them on a  white card base.   The sentiment is from Impression Obsession’s Valentine Hearts set.

Because it is getting late, I will wait to share the remaining  cards tomorrow! Take care and sweet dreams!

Hugs,

Stephanie
A Die-cut Christmas

Howdy folks!  It’s been a long while since I posted last.  Too many challenges with health and well-being, along with the great planning and excitement of my oldest son’s graduation from college! 🙂  I can’t tell you enough about how proud I am of his accomplishments!  He has a job lined up – 2 days after graduation – and starts in January 2015.

Since I have a bunch of pictures of the cards I made for this Christmas – I will list supplies for all of them at the end of this post.  I tried to remember everything I used, but I may have missed something – so if you have any questions, please leave me a comment, and I will try to address it as soon as I can.

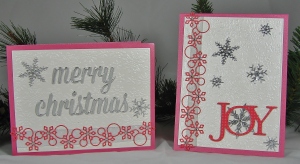
While I own more stamps than any one woman should have, I also am in the same predicament with steel dies.  I love, love, love them!  The front of all the cards were done solely with dies – with the exception of one card.  All of the insides of the cards, however, do have stamped sentiments (from Penny Black’s Christmas Cheer stamp set).

Without further ado ….

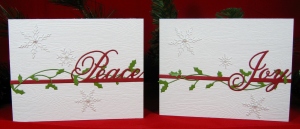
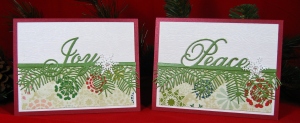
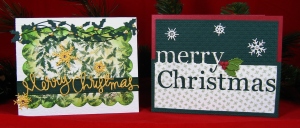
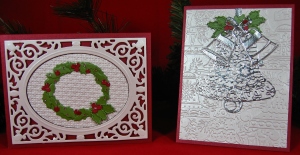
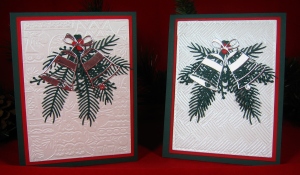
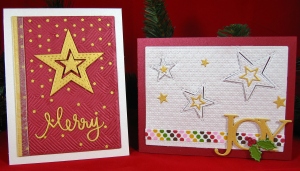
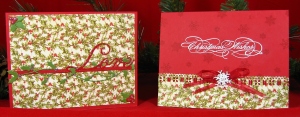
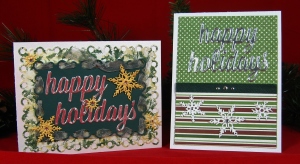
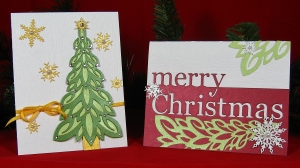
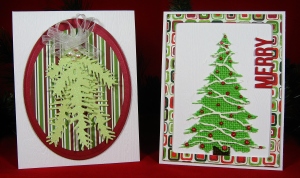
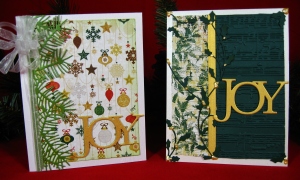
Xmas Set 1 Xmas Set 2 Xmas Set 3 Xmas Set 4 Xmas Set 5 Xmas Set 6 Xmas Set 7 Xmas Set 8 Xmas Set 9 Xmas Set 10 Xmas Set 11 Xmas Set 12

I used really pretty shimmer cardstock and the pictures do not do them justice!  Even the shimmer from the Zig’s Wink of Stella pen does not show well in these pictures.  I guess I need to invest in a better camera – these are taken from a little digital camera — any recommendations?  I hear the DSLR cameras are great.   Any thoughts about the  Canon EOS Rebel T5 DSLR?  I noticed the reviews on Amazon are great (and the prices for the camera and accessories packages are dropping).

I wish everyone a very Merry Christmas, Happy Holidays, and pray for better health and happiness for the rest of this year and in 2015!  Don’t be a stranger! 🙂

Hugs,

Stephanie
Supply List

Stamps

Penny Black’s Christmas Cheer

Waltzingmousestamps.com Seasonal Flourish

Dies 

Memory Box Frosted Christmas Tree

Memory Box “Bells Are Ringing” (98683)

Memory Box Pine Needle Border (98467)

Memory Box Cosmic Star Set (98464)

Memory Box Holly Vine (98188)

Memory Box Grand Merry Christmas (98680)

Memory Box Gabriella Border (98649)

My Favorite Things’s Dienamics “MERRY” Photo Frame (mftstamps.com)

Savvy Dies “JOY”

Impression Obsession’s Small Snowlakes (iostamps.com DIE100-F)

Marianne Creatables Pine Branch (LR-0181)

Cottage Cutz Winter Pine Branch (CCE-045)

Lil’ Inker Designs Stitched Snowflakes (lilinkerdesigns.com)

Cheery Lynn Designs “Bows and Bells” (cheerylynndesigns.com DL163)

Dee’s Distinctively Christmas Tree #3

Simon Says Stamp “Merry Christmas” Die

Simon Says Stamp Falling Stars Die Plate

Craft Dies by Sue Wilson “Holly Accessory Kit” (CED3014)

Papertrey Ink’s One Liners Die Collection (papertreyink.com)

Spellbinders Ovals

Spellbinders Matting Sets A & B

Embossing Folders 

Stampin’ Up Textured Impressions Square Lattice

Anna Griffin Swedish Bells

Embossalicious Die’sire “Let It Snow”

Sizzix Tim Holtz Alterations Sheet Music A2

Darice Basketweave

Paper – Bases

Paperandmore.com Wood Grain Lumba White 111# (Best woodgrain paper out there IMHO)

Paperandmore.com Pine Linen Cardstock 80#

Paperandmore.com Cherry Red Cardstock 100#

Papertreyink.com Shimmer Paper – Cream, White, Scarlet, Raspberry

Paper – Accents 

Paperandmore.com Pearl Metallic 107# (5×7)

Paperandmore.com Gold Metallic 105# (5×7)

Paperandmore.com Crimson Red Metallic 105# (5×7)

Paperandmore.com Fairway Green Metallic 105# (5×7)

Bo Bunny Mistletoe  (6×6)

DCWV Burlap Mat Stack

DCWV Glitter Cardstock (6×6)

Lawn Fawn Peace, Love, Joy (6×6)

Fancy Pants “Oh, Deer” (6×6)

Carta Bella “So This Is Christmas” (6×6)

Crate Paper “Bundled up” (6×6)

Other 

Aluminum Tape

Ranger’s Tim Holtz Distress Inks – Mowed Lawn, Barn Door

Marvy Uchida Liquid Applique

Bling and pearls from stash

Various ribbons from Papermart.com

Versamark

Ranger Super Fine Detail Embossing Powder (sentiments inside some cards)

Memento Luxe Northern Pine Pigment Ink (inside some cards)

Ranger Liquid Pearls – Buttercup  (for some reason, it went  on great, but by next day -everything was a blob!

End of  Supplies

OCC Clean & Simple 3 – Days 7 & 8 – Creative Coloring: Tracing Images

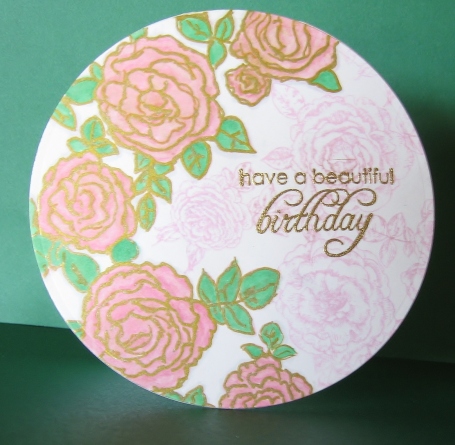
The card by Tasnim Ahmed is totally spectacular!  I struggled with finding an image with which I could replicate her technique.  Most of my backgrounds are either very simple or very,very detailed – as with the Impression Obsession C-A-C Roses background which I used on this one layer card.

Image

created by Stephanie S. Bush @ inkyantics.wordpress.com
In tracing the image, much of the original detail got lost.  However, I like the contrast between the traced images and the original stamped images in the background.  I used copic markers to color the image and a Uni-Ball Signo gold gel pen for tracing. Need to get hopping on the housework for a bit before trying some more “homework”! Hugs!

OCC Clean & Simple 3 – Days 7 & 8 – Creative Coloring: Simple Copic Coloring

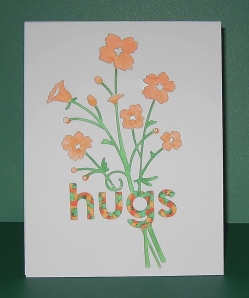
One of the creative coloring techniques presented in class is simple copic coloring.   Essentially, you color with copics on vellum so that it shows through a die cut window of the card.

I chose two dies with which to create the windows on the panel of the card.  First, I cut the word “hugs” and then, I partially die cut the flowers from the top of the panel, down to the tip of the “u” in hugs and then, cut the die from the bottom of the panel up to the “g” in the word “hugs”.   As I am looking at the card now, I realize I probably should have extended the cut between the “u” and the “g”. Oh well.  It is just practice. 🙂  I still think it turned out quite lovely!  And at first glance, I doubt anyone would notice…. I certainly didn’t as I was creating it.

I colored with copics.  I used the brush end to “dot” color over the letters.  I used the darkest color of each set on the words and two of the lighter colors on the stems and flowers.

Creative Hugs

created by Stephanie S. Bush @ inkyantics.wordpress.com
On to more “homework”!  I just love “homework”, don’t you?  It sure as heck beats doing housework!!! Hugs!

OCC Clean & Simple 3 – Days 5 & 6 – Backgrounds into Foregrounds: Graffiti Stamping

I have to say that I have NEVER seen graffiti as pretty as Shari Carroll demonstrated on her card!! 🙂

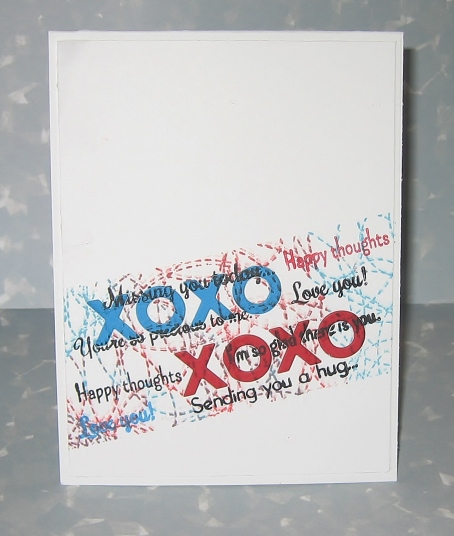
To be more authentic in regards to “graffiti”, I intentionally (yea, right!) went for the more messy variation! (if you believe that, I have some ocean front property here in Oklahoma!).

While I did intend to put the sentiments at a slant (honestly, I did!), they weren’t lined up very well (in my opinion).  So, to “fool the eye”, I added the stitching pattern over the entire thing!  This helped it to look more “graffiti-ish”, IMO! 🙂

Image

created by Stephanie S. Bush @ inkyantics.wordpress.com
I am off to do more “homework” and then some housework (yuck!).  Hugs to all!

OCC Clean & Simple 3 – Days 5 & 6 – Backgrounds into Foregrounds: Iron-Off Embossing

Days 5 & 6 of  Online Card Classes’ Clean & Simple 3 class have come and gone, but everyone still has a chance to get their “homework” into the gallery until the end of next week.  These two days focused on  “Backgrounds into Foregrounds” and included Iron-Off Embossing, Masked Backgrounds and Graffiti stamping. 

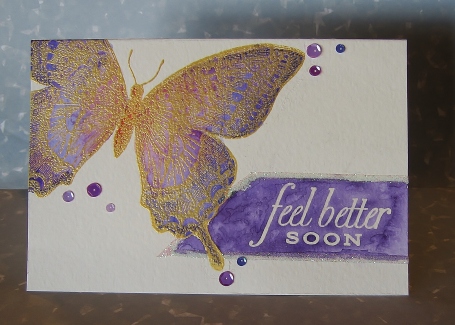
The following card incorporates the Iron-Off Embossing technique in the sentiment.  I learned a couple of things doing this card – first, the Zig embossing pen, at least on watercolor paper, tends to stay “blue” (it’s my understanding that it’s supposed to  turn clear once embossed!).  The second thing I learned – is that even with a ruler, I still can’t draw a straight line!!! lol

First, I stamped the butterfly image with gold ink and heat embossed with Ranger’s Pale Gold embossing powder. I stamped the sentiment with Versamark and embossed with clear embossing powder.  In order to give a “boundary” to the watercolor background for the sentiment, I drew a border around the sentiment with the Zig embossing pen (which has a blue tint so that you can see what you are drawing/writing).  Then, I heat embossed with clear embossing powder.

After watercoloring the butterfly and the background around the sentiment,  I ironed off the sentiment and the border around the sentiment.  That is when I discovered the line around the watercolor background was still blue! Well, I haven’t crafted all these years without figuring out how to cover-up mistakes!  So, I took the 1/8th” Sookwang tape and put it over the blue lines around the sentiment, and applied glitter!  I was pleased to see the effect it gave the sentiment — the whole area looks “recessed” in relation to the butterfly. Pretty cool!  I applied some sequins for texture (and to cover up a few little water color splats! 

This is a rather large card – 4.75″ x 7″.  It’s one of the 5″ x 7″ Strathmore watercolor cards which I trimmed down a bit.

Image

created by Stephanie S. Bush @ inkyantics.wordpress.com

Hope everyone else is getting their “homework” done and into the galleries!  I love looking at all the great ideas! Hugs!

OCC Clean & Simple 3 – Days 3 & 4 – Optical Illusions: Masking

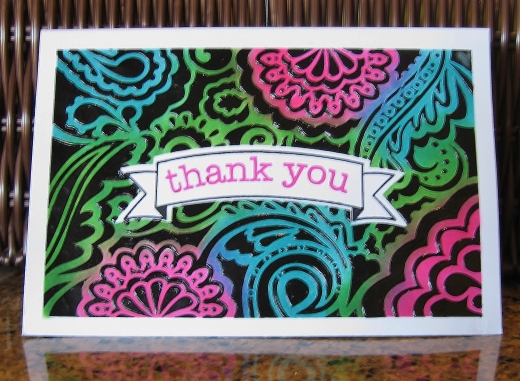
OK…..WHAT WAS I THINKING!!!  BLACK embossing paste on WHITE cardstock!  That’s a recipe for disaster and frustration in my book! lol  The card-making spirit was with me yesterday and today as I finished this card.  I did manage to get some of the black embossing paste on the bottom right corner of the card, but I let it dry and then scraped it off with an XACTO blade.  The only other mishap was the stamping of the label, where I was off a little on the left side of the area I had masked off with the die cut.  It really does give the illusion of another dimension on the card!

Image

by Stephanie S. Bush @ inkyantics.wordpress.com

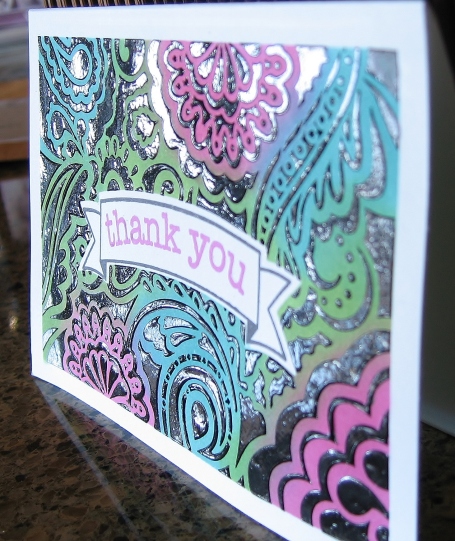
Here is a side view of the card — the black embossing paste is very glossy!

Image

by Stephanie S. Bush @ inkyantics.wordpress.com

Supplies:

  • Memory Box stencil – Rhapsody (Style 88515)
  • Dreamweaver Glossy Black Embossing Paste
  • Distress Inks (Peacock Feathers, Picked Raspberry, Mowed Lawn)
  • Neenah Solar White Cardstock
  • Paper Smooches Streamers (dies)
  • Paper Smooches Streamers (stamps)
  • Sentiment from Hero Arts Essentials Messages set (CL371)
  • Archival Ink – Magenta Hue

Now it’s off to see what more is going on in class!  Catcha later! Hugs!

OCC Clean & Simple 3 – Days 3&4 – Optical Illusions: Scenes

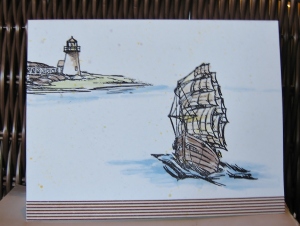
Julie Ebersole’s card for this class is totally awesome!  Unfortunately, I really don’t own any sets that lend themselves to creating scenes “with distance”.  Hmmmm.  I did have a boat stamp set, and I attempted to do as Julie instructed.   Not sure how I feel about this card…

By Stephanie S. Bush @ inkyantics.wordpress.com

By Stephanie S. Bush @ inkyantics.wordpress.com

Supplies:

  • Neenah Solar White cardstock
  • Ranger Archival Black ink
  • Flourishes A Guiding Light stamp set (www.flourishes.org)
  • “Watercolor” – Memento Inkpads (New Sprout, Dandelion, Toffee Crunch, Summer Sky, and Desert Sand)
  • Washi tape

Hope everyone is enjoying class! Hugs!


OCC Clean & Simple 3 – Days 1 & 2 Homework (continued)

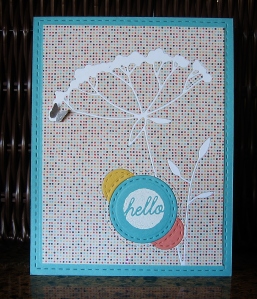
This next card uses the “faux layering” technique to create a “flat” card front with multiple “layers” of inlaid die cuts.  As you can see in this card, with the exception of the small butterfly, all the elements are flush with the designer paper layer.

???????????????????????????????????????????????

by Stephanie S. Bush @ inkyantics.wordpress.com

Supplies:

  • Neenah Solar White Cardstock
  • Designer paper from Basic Grey Paper Cottage 6×6
  • Solid colored cardstocks from Gina K. Designs (http://shop.ginakdesigns.com/)
  • Graceful Silhouette Die by Memory Box (http://memoryboxco.com/)
  • Lil’ Inker Stitched Circles (http://www.lilinkerdesigns.com/)
  • Sentiment from June 2012 Studio Calico card maker set
  • Versamark Ink and Wow! Opaque Bright White Embossing Powder
  • Butterfly punch by Martha Stewart

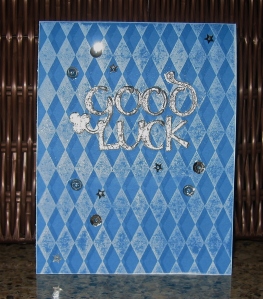
This next card was made with the multi-layered stamping to create a “faux” letterpress look on the background.  I also used embossing paste, with embossing powder over it, heated it up to create the raised “good luck”.

OCC3 Good Luck

by Stephanie S. Bush @ inkyantics.wordpress.com

Supplies:

  • Gina K. Pure Luxury Blue Raspberry Cardstock
  • Impression Obsession Harlequin background stamp
  • Versamark
  • WPlus9 Pure Pigment Inkpad in White
  • Sequins
  • Sizziz Brass “good luck” stencil

Now onwards to Day 3 & 4 homework!

Online Card Classes – Clean & Simple 3 Has Begun! Homework for Days 1 & 2

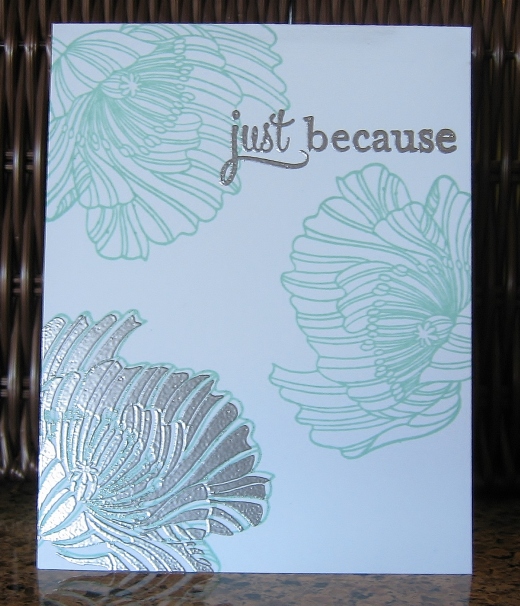
I am off on a new adventure, well – a class really, with the gals at onlinecardclasses.com for their third Clean & Simple card classes. yea!!!  Making clean and simple cards is harder than you think!  I love these classes as the ladies always have something great to share and lots of tips and tricks.  The class started this past Monday and, as usual, I am already behind on the “homework”!  The first two days of the week covered different “faux” techniques.  Here is a single layer card I designed using silver embossing powder as “faux” metal for the sentiment and flower embellishment in the corner.

Image

by Stephanie S. Bush @ inkyantics.wordpress.com

Supplies:

Have a splendid day!  More posts to come!